Why a Jigsaw Puzzle Starts at the Edge
Why a jigsaw puzzle starts at the edge: learn how border pieces define the workspace, create reliable reference points, and make the interior easier to sort.
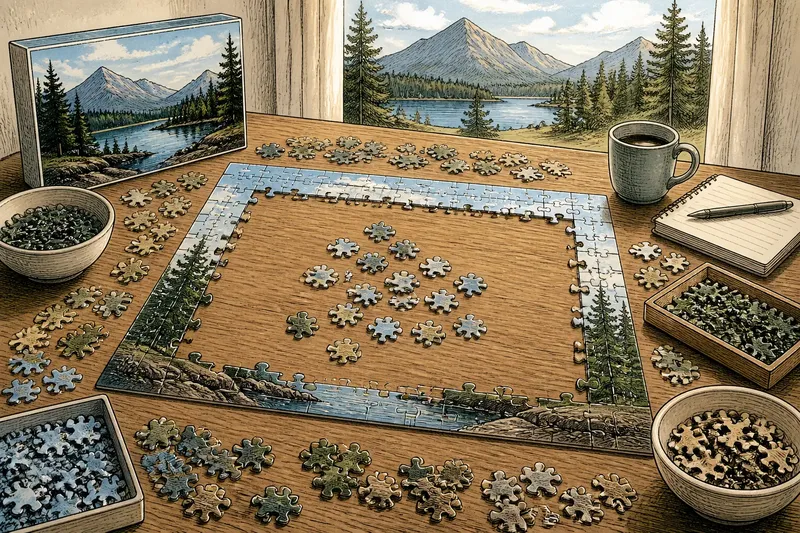
Why a jigsaw puzzle starts at the edge becomes clear when you spread the pieces across a table: the border gives you a visible outline before the picture has taken shape. That outline defines the puzzle’s working space, anchors its corners, and gives you fixed reference points for placing pieces inside.
Starting at the edge is a useful method, not a rule. The process works best when you treat the border as a map for the unfinished picture rather than a race to complete a frame. Here is how to find, build, and use that map.
Choose a surface that fits the puzzle
Before sorting, check the box image and choose a flat surface with room for the puzzle and a separate area for loose pieces. A dining table, puzzle board, or large sheet of sturdy cardboard can work. Leave enough space around the planned puzzle area to move pieces without knocking the border out of alignment.
If the puzzle needs to be moved before you finish, a puzzle mat or rigid board can help keep the arrangement together. Check that the surface is clean and dry; crumbs, raised seams, and table edges can make pieces slide or sit unevenly. Keep the box image nearby as a reference, ideally where you can see it without reaching over the puzzle.
Find the pieces with one flat side
Spread the pieces picture-side up in a loose layer. Look for pieces with at least one straight outer edge. These are border pieces; corner pieces have two straight sides that meet at an angle. Separate the corners from the other border pieces, then keep the remaining pieces in a nearby group.
Turn over only the pieces you need to inspect. A border piece can be easy to miss when it is partly covered or lies face down, so check the full spread rather than relying on a quick glance. If the box shows a rectangular puzzle, expect four corners; for a shaped puzzle, follow the outline shown on the box instead of assuming every side is straight.
Say you are working on an invented landscape puzzle with a pale sky and a dark tree line. You could first gather every piece with a straight side, then set aside the corner pieces and group the rest by the colors along their edges. The expected observable result is a clearer border workspace and fewer loose pieces mixed into the interior pile—not a finished frame at once.
Place the corners before filling the sides
Set the corner pieces near the positions suggested by the box image: top left, top right, bottom left, and bottom right. Match their printed colors and details to the corresponding regions of the picture. If two corners look similar, leave them slightly apart until their orientation is clearer.
Next, arrange the non-corner border pieces into rough side groups. Use visible color changes, printed lines, or recognizable details to distinguish the top, bottom, and sides. A strip of blue sky may point toward the top, while a road or dark ground color may belong near the bottom; the image, not the shape alone, should guide that choice.
Place each likely side between its matching corners, but avoid forcing pieces together. A correct fit should sit flat and connect cleanly. If a piece seems to fit only when twisted or pushed, lift it out and compare its tabs and openings with the neighboring pieces again.
Build the border in manageable runs
Work along one side at a time, beginning with the pieces whose printed details are easiest to recognize. You do not need to complete the entire top edge before touching the left side. A short, secure run can help identify where nearby pieces belong, while an uncertain section can stay open until more evidence appears.
Compare the shape of each piece with the empty spaces between the corners. A straight outer edge establishes which side faces outward; the remaining tabs and openings determine how the piece connects inward. Use both clues together. Two pieces may share the same colors but have incompatible inner contours.
As a section grows, check its alignment against the box picture. The border should follow the same overall proportions and image placement, though loose pieces may shift slightly as you work. If a run looks bent or uneven, inspect the joins and lift the suspect piece rather than adjusting the whole side around it.
Use the frame as a reference for the interior
Once part of the border is in place, it starts doing more than containing pieces. It tells you how much space the finished picture occupies, where its outer features sit, and which direction is up. That makes the box image easier to compare with the actual puzzle, especially when a design has repeated colors or patterns.
Sort interior pieces with reference points from the border. A piece showing the same sky color as the top edge may belong in the upper region; a line or object that touches the frame can indicate a more precise location. Keep the box image visible, and group pieces by a useful visual clue such as color, texture, or a distinctive printed object.
Do not treat the frame as proof that every nearby piece belongs beside it. A color may recur in different parts of the picture, and a piece can look plausible in more than one place. Check its printed details and shape against the neighboring openings before committing to a placement.
Why does starting at the edge help?
Do all jigsaw puzzles have straight borders?
No. Many puzzles have a conventional rectangular outline, but shaped designs can have curved or irregular edges. Use the box image to identify the perimeter, and gather pieces whose outer contours match it.
What if the border pieces look alike?
Sort them by the colors and details printed near their straight edges, then compare each group with the corresponding part of the box image. If several remain uncertain, keep them loose rather than guessing their side.
Can I start with the picture instead?
Yes. A striking central object, a clear color block, or a recognizable face may be easier to assemble than a uniform border. You can build that section first and use the edge pieces later to locate it within the full outline.
What should I do if a piece seems to fit but sits unevenly?
Take it out and check the adjoining shapes and printed image. A piece should lie flat and connect without pressure; forcing it can disturb nearby pieces or hide a mismatch.
Leave uncertain edges open until the clues improve
A complete border can make the workspace feel organized, but finishing it is not a requirement for making progress. If the edge has several nearly identical pieces, move to a clearer section or work on a distinctive interior feature. Return when that new section supplies a color or image clue that narrows the choices.
Keep rejected candidates close to the side they might belong to, but separate them from pieces that are already joined. This makes it easier to revisit a possibility without repeatedly sorting the whole spread. If the puzzle board must be moved, use a flat support and follow the board or mat maker’s handling directions.
The reason a jigsaw puzzle starts at the edge is practical: the border turns an open-ended scatter into a bounded space with corners, sides, and visual coordinates. Build it where the clues are clear, leave doubtful joins alone, and use each completed section to orient the next. The frame is most helpful when it guides your choices without dictating the order of every piece.